![Logo Arenametrix détouré blanc HD.png]](https://guide.arenametrix.com/hs-fs/hubfs/Logo%20Arenametrix%20d%C3%A9tour%C3%A9%20blanc%20HD.png?height=44&name=Logo%20Arenametrix%20d%C3%A9tour%C3%A9%20blanc%20HD.png)
In Brevo, two types of forms allow you to manage your contacts' consents:
- The sign-up form is the entry point: it allows a new contact to give their agreement and select the types of communications they wish to receive. It is created from the Subscription tab.
- The profile update form is aimed at your already subscribed contacts. It allows them to modify their preferences at any time without having to unsubscribe entirely. It is created from the Profile update tab. Once created, it is integrated into the footer of your emails via a "Manage my preferences" link, allowing your contacts to update their consents in one click.
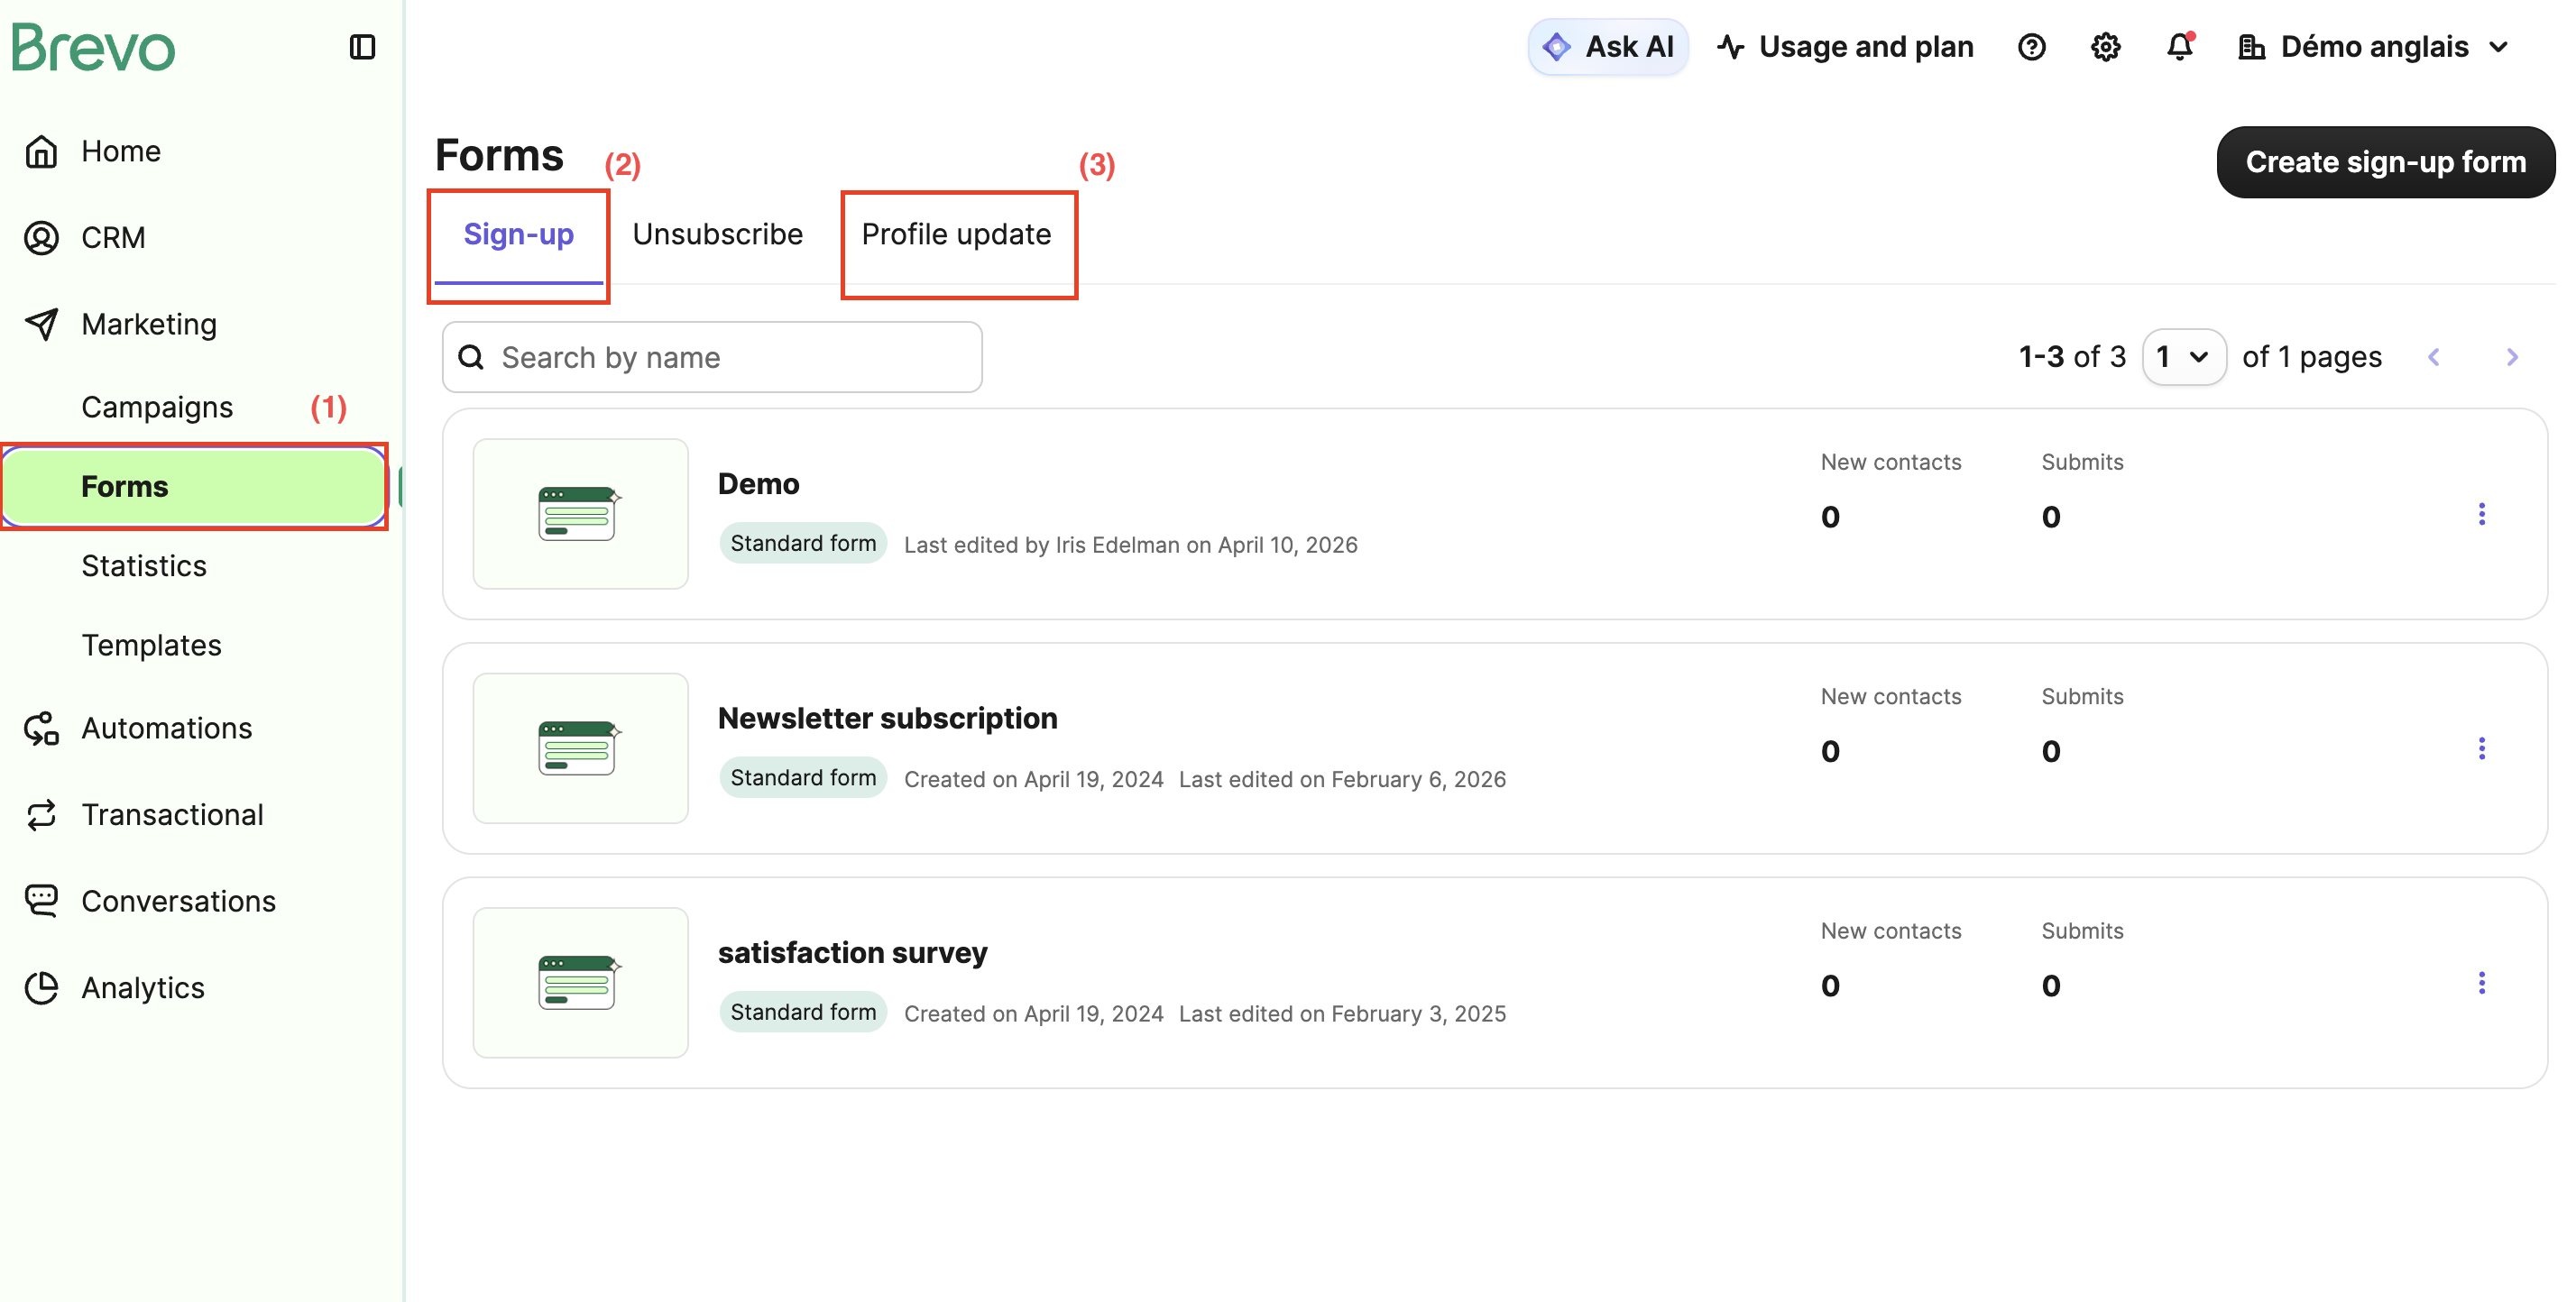
The process is identical for both. In Brevo, go to Forms (1), select the tab corresponding to the type of form you want: Subscription (2) or Profile update (3), then click the creation button.
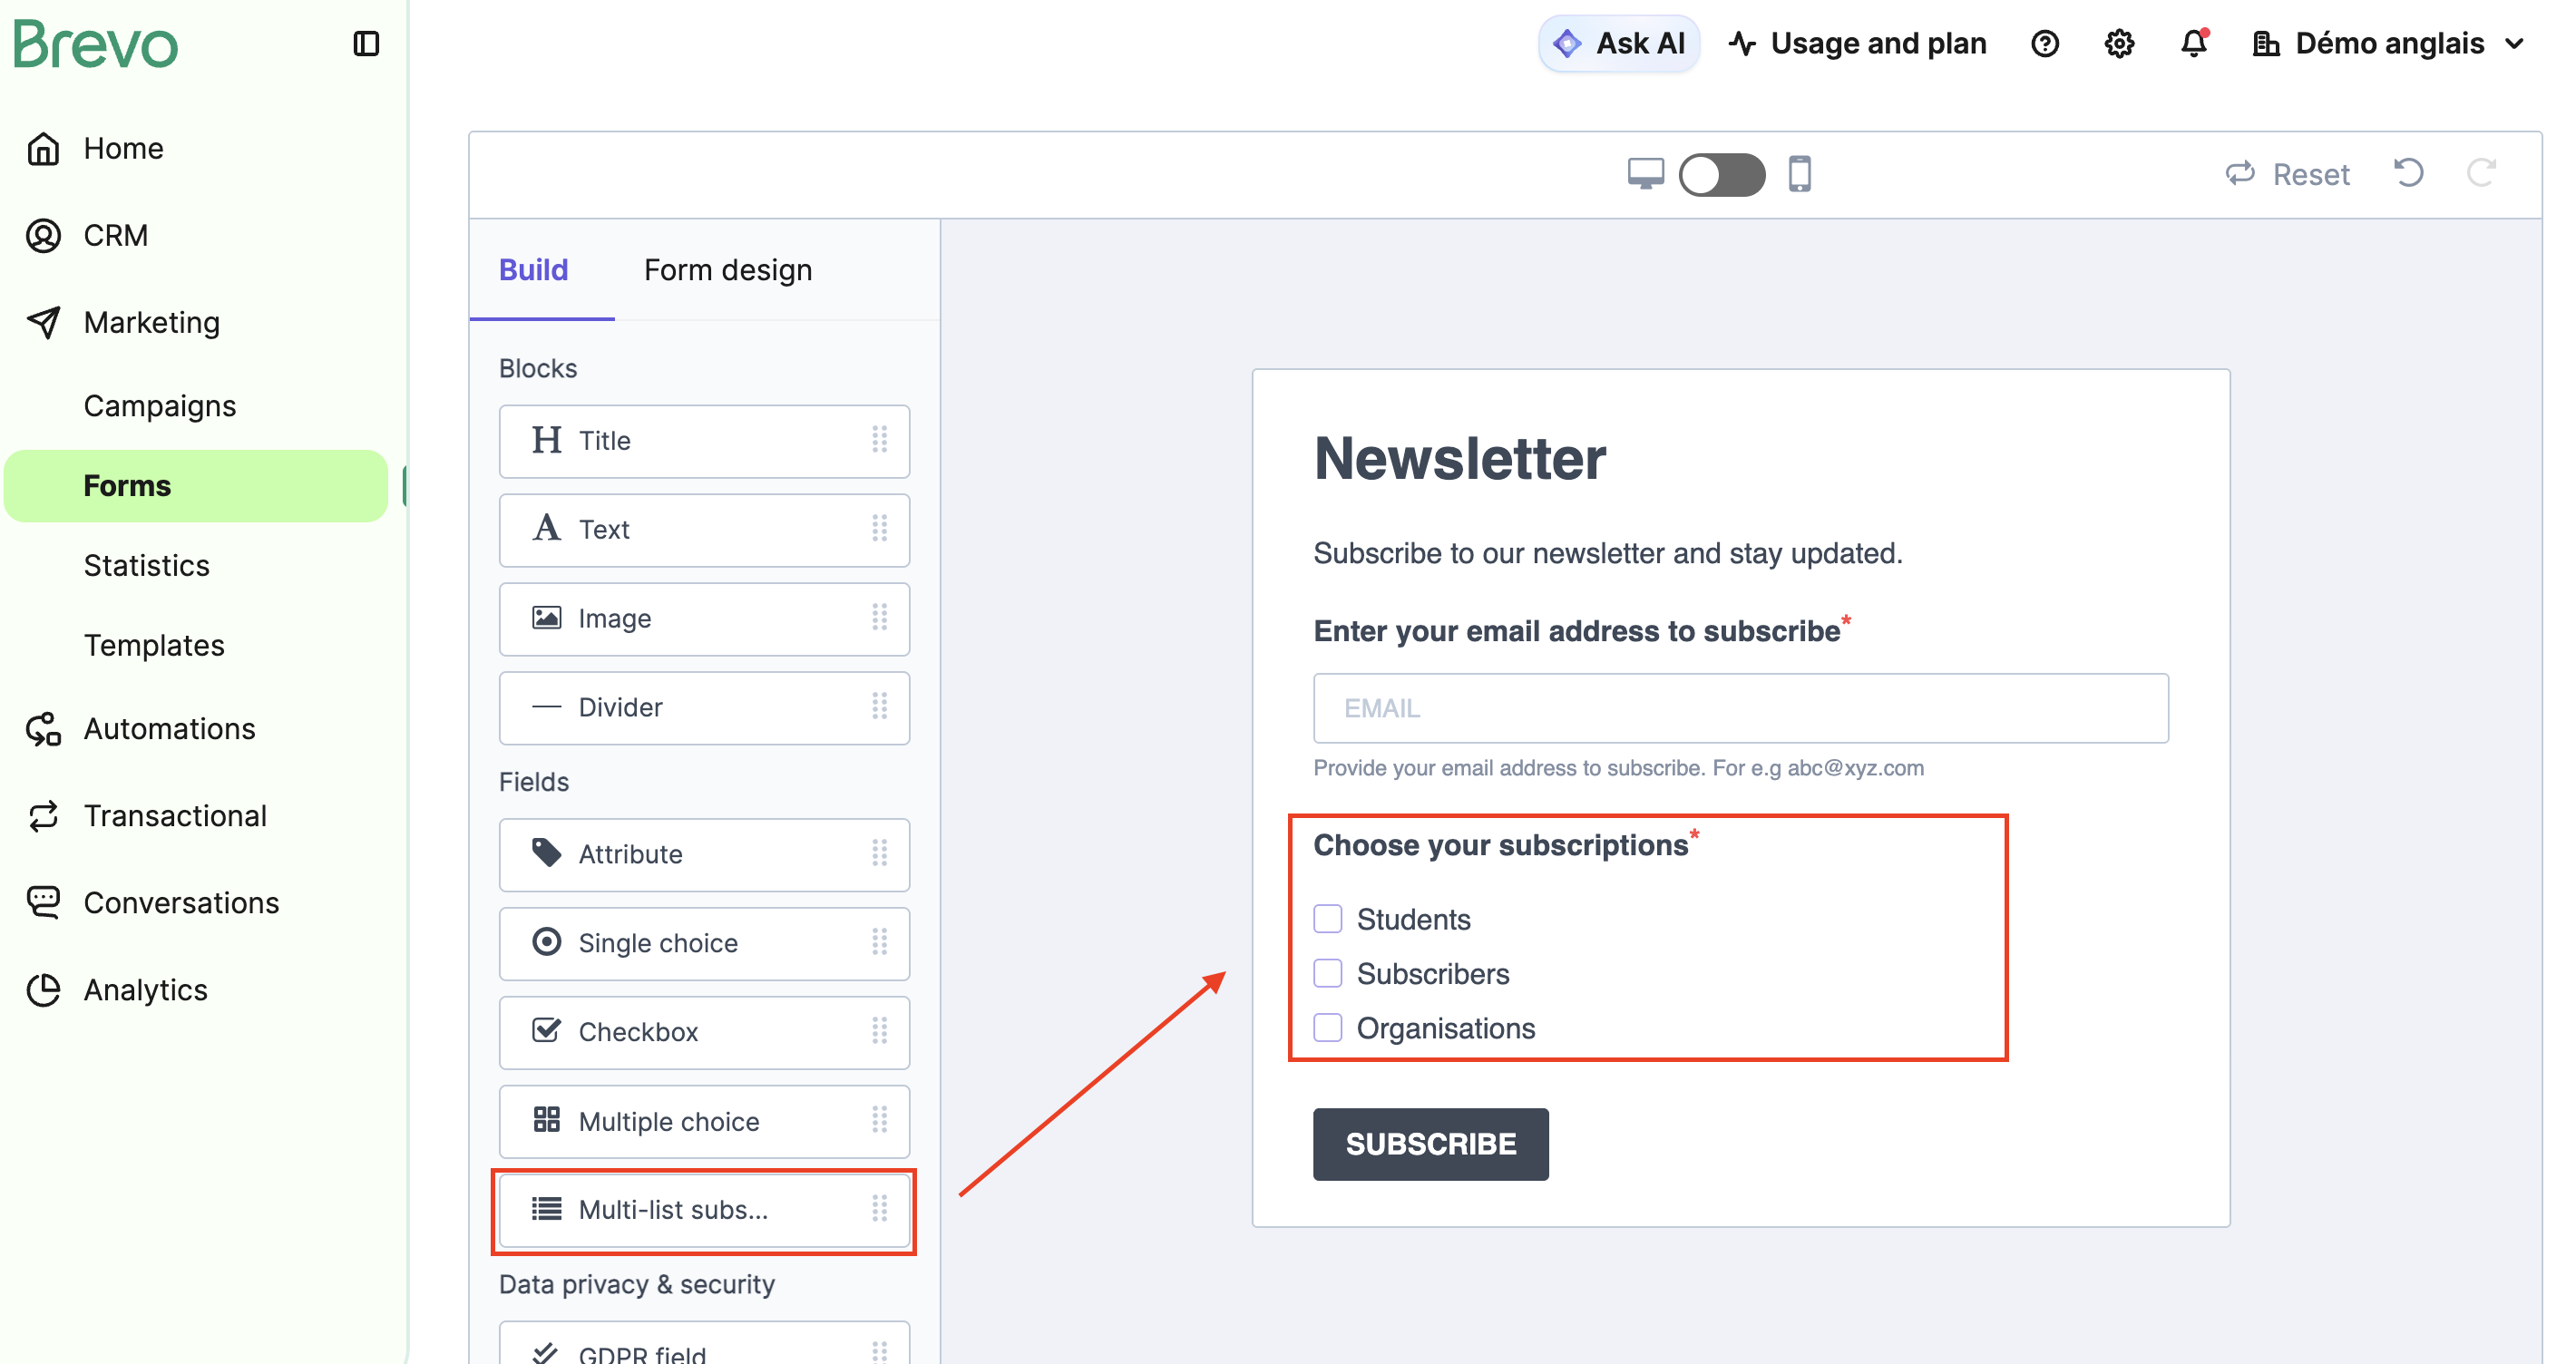
Give your form a name, then move to the Design step. In the left column, drag a Multi-list subscription block into your form. This block is essential: it displays your different consents as checkboxes, so your contacts can select or deselect the communications they wish to receive.
To understand how to configure this block in detail, see the article Adding a multi-list subscription field to your forms.
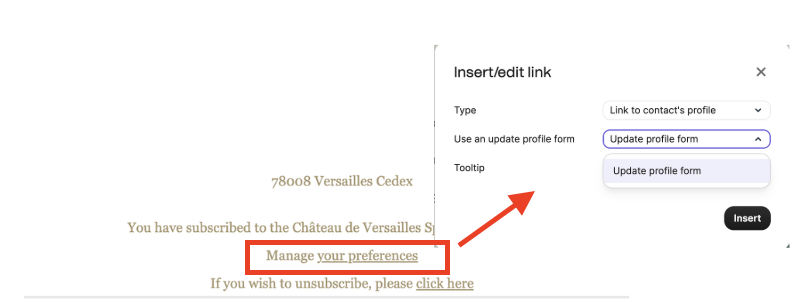
Once your profile update form is created, add a link to it in the footer of all your communications. In the Brevo email editor, select the text of your choice (for example "Manage my preferences"), click Insert a link, choose the link type Update your preferences, and select the form created previously. This link typically appears alongside the unsubscribe link at the bottom of your emails.